We have spoken about Cayenne, Blynk and other open source IoT platforms in other tutorials. We saw in the tutorial how to setup cayenne app builder with raspberry pi. In this tutorial we will work on Blynk setup with raspberry pi.
Blynk was designed for the Internet of Things. It can control hardware remotely, it can display sensor data, it can store data, visualize it and do many other cool things.
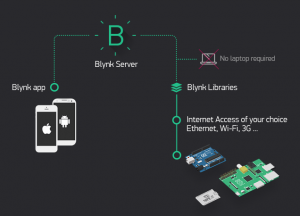
There are three major components in the platform:
- Blynk App - allows to you create amazing interfaces for your projects using various widgets we provide.
- Blynk Server - responsible for all the communications between the smartphone and hardware. You can use our Blynk Cloud or run your private Blynk server locally. It’s open-source, could easily handle thousands of devices and can even be launched on a Raspberry Pi.
- Blynk Libraries - for all the popular hardware platforms - enable communication with the server and process all the incoming and out coming commands.
Blynk can work with Arduino, Raspberry Pi, or a similar development kit. Blynk works through internet, the hardware you choose should be able to connect to the internet through ethernet of wifi. The Blynk App works through smart phone , It works on both iOS and Android,.
Blynk works with any model of Raspberry Pi over WiFi / Ethernet. Blynk doesn't support Bluetooth connection to pi.
How to install Blynk on Raspberry Pi:
For connecting blynk to raspberry pi, first we need to install blynk libraries in raspberry pi and also need to use use Node.JS or C++ for writing apps. For install blynk libraries on raspberry pi you need to install the required components git core and wiringPi. Follow the below commands to setup blynk raspberry pi server.
Make sure your Pi is up to date with the latest versions of Raspbian
sudo apt-get update
If you do not have GIT installed, you can install it with
sudo apt-get install git-core
Install WiringPi using GIT
git clone git://git.drogon.net/wiringPi
switch to wiringPi and run the buid.
cd wiringPi
./build
To install blynk globally run the below commands:
git clone https://github.com/blynkkk/blynk-library.git
make clean all target=raspberry
Now you have blynk library for raspberry pi installed . To start working with blynk and raspberry pi we need to install blynk app on smart phone.
Another way is using Node.js and Blynk Installation
Check if Node.js is installed,
Run the command in terminal on your board
node --version
or
nodejs --version
If you get the version then Node.Js is installed.
If not you can insta Node.Js using the below commands.
Add repositories:
curl -sL https://deb.nodesource.com/setup_6.x | sudo -E bash -Install Node.js:
sudo apt-get update && sudo apt-get upgrade
sudo apt-get install build-essential nodejs -y
Install Blynk globally
sudo npm install -g npm
sudo npm install -g onoff
sudo npm install -g blynk-library
How to connect Raspberry Pi and Blynk:
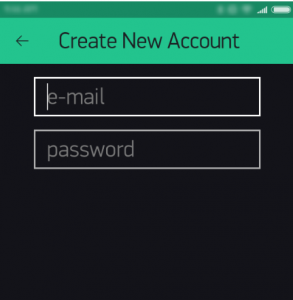
Download blynk app and create an account by entering email address password and click on sign up..
Blynk application can be found from the following links -
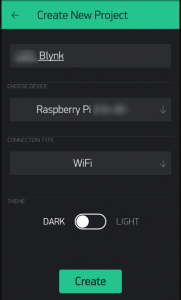
Click the “Create New Project” in the app to create a new Blynk app. Give a name and select device Raspberry Pi and connection type WiFi ( if pi is connected through WiFi), click create .
The Auth token will be assigned and this can be send to the email. The Auth token will be used for connecting from raspberry pi to the new project widget.
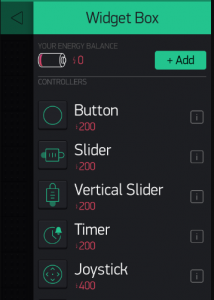
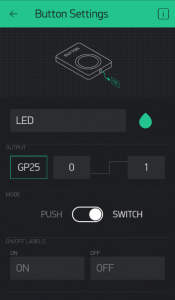
Open the blank project and add widgets. Lets add a button for led.From the widget box select button and give the name as LED. Select the pins ad digital pins and the pin number in Raspberry pi to which the led is connected.
You have the widget ready now.
Connect the raspberry pi to the blynk widget running the Auth token command.
blynk-client "your auth token"
This should print out something like below.
Connecting to SSL: cloud.blynk.cc 8441
Connected, authorized
Blynk ready.
Raspberry pi is connected with your blynk raspberry pi projects. Click the “Run” button in the top right corner of the Blynk app and press the button on Blynk app and watch the LED.You can add more widget to the project.
